Showing posts with label costumes. Show all posts

Thursday, October 27, 2011

It's the best time of year...

...and no, I'm not talking about Christmas. I adore holidays of all kinds, but, besides birthdays, I have to say Halloween tops the list at our house. Come on, you get to dress up and get free candy! And yes, I do dress up (and yes, my kids get the candy, but it's so fun to watch them!).

As a craft addict, Halloween seems to be the ultimate outlet for my creativity. Plus it's an opportunity for me to tap into one of my passions: movie costumes. If somehow I could live two lives, my second life would be as a costume designer. Ah, the fabrics, the hairpieces, the jewelry, the colors, the way it all comes together to blend into the world within the movie. I love it!

So the last few weeks I've been working hard on our costumes this year, and I love the way they turned out! So please pardon while I do a little Halloween preview...

We've been Star Wars characters the last couple of years, so I felt like it was time to do something new. I already have a Lord of the Rings-ish elf costume, so I wanted to go with that this year. Since there are no cute little babies in the film, my baby gets to be a cute little elf only loosely tied to the theme.

babyelf2

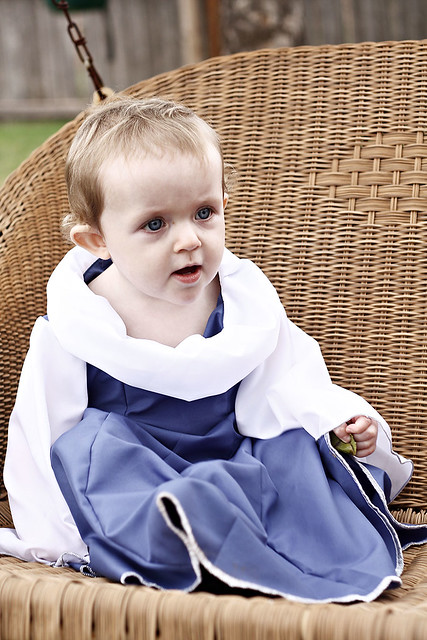
I used the same sewing pattern for both the kids -- it included some Renaissance-style dresses and a knight's outfit. I had to cut this down for my girlie; the smallest size was 3 and she's in 18 months. I did this by cutting the pieces out inside the smallest size lines, and then I used a generous seam allowance when I put it together. I then tried it on her -- it fit farely well, just had to take some extra in on the shoulder seam and consequently adjust the shoulder hole.

babyelf4

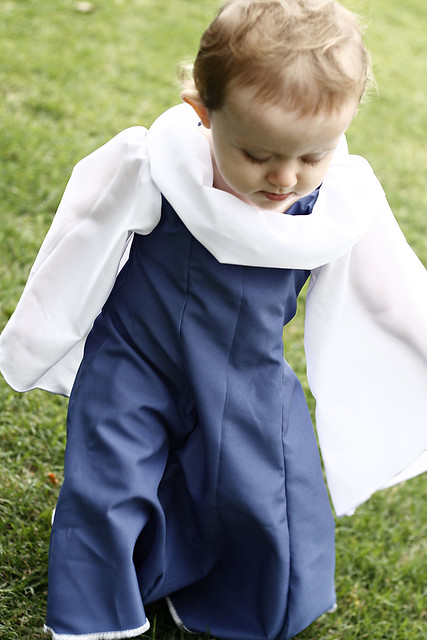
I also used my serger to make a fancy edging on the sleeves and along the bottom. It definitely cut off a lot of time trying to hem the odd shapes on Renaissance sleeves and the rounded dress.

babyelf5

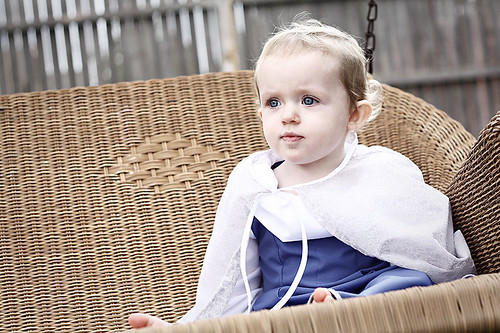
I also practiced doing French seams on the sleeves and this little cloak I made. Both were sheer fabrics, so this was an elegant, professional way to do the seams without raw edges hanging out. French seams are really easy, too! I just looked it up on YouTube.

For my son, I've been wanting to make this costume for a few years. He's my favorite character from the movie!

legolas1

I had so much fun doing this one! The only thing he's missing is a blond wig; he does have a bow, just didn't bring it to this Halloween party.

legolas2

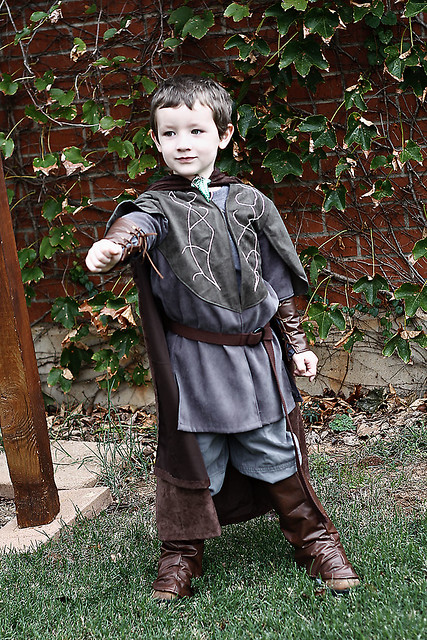
I used the knight's tunic pattern to make the jerkin  and simply had it open in the front instead of the back. NOTE: If you're going to do this, remember to add a little extra to the edges. Cutting it in half and then hemming along the front cut too much into tunic; luckily it was big enough, but it does pull toward that middle instead of laying with the side seams where you want them.

I then added the green parts on the front, across the back and on the sleeves. I used the same pattern to make the boot covers and put snaps on to close them in the back so I can easily adjust the size and he can wear them for a few years. The arm braces were going to be closed with velcro, but I realized I made them too small. So I used my leather punch from this tutorial, and put eyelets in evenly on both sides and laced them up with suede cord I found in the jewelry aisle at the store. I can also use the arm braces for several years because they're adjustable.

My hubby will be a ring wraith -- I'll share next week!

Tuesday, May 3, 2011

Epic failure... or I-learned-a-lot success?

Ugh! I hate projects from which I learn a lot, aka I messed up a ton, although I should get used to it (it happens more frequently than I'd like to admit).

So my little man had his 4th birthday a few weeks ago, and I knew I wanted to do something special for him. He's just gotten into make believe and dressing up (not to the extent of his girl friends, but you know). I made him a super cape (his term, "super kate,") a few months ago and he loves it.


Now he's very big into Disney's little pirate cartoon, so I thought I'd make him a vest and bandana like the main character on the show. It started out simple enough... I used one of his shirts to cut out my pieces: two backs and four fronts, so I could fully line it.


But I haven't made a vest before, and let's just say the way I thought it would work in my head was SOOOO not the way it needs to actually work. I started putting it together and that's when things started to fall apart (only figuratively). PS- Don't start sewing sides and shoulders and arm holes like you would a shirt if you're lining it. Doesn't work...

I HATE unpicking things, but it never fails -- almost every sewing project I do with a pattern, I end up misunderstanding something, sewing it the wrong way and having to unpick my seam. My seam ripper and I are good frenemies...

With this project, I unpicked, a LOT. And here's what's stupid: One of my favorite craft blogs has an excellent tutorial on doing a lined vest. I had read it a couple months ago, but didn't take the time to go over and reread it before I started my project. Could have saved myself a lot of time. Booooooo....

So I guess the moral of the story here could be to really do your research/double check the pattern at the beginning of your project. As I kept unpicking the arm holes, then unpicking all around the vest, I just kept thinking to myself, "Epic failure..." Also, if you get tempted to just throw the whole thing in the garbage, with a lot of angry force, just remember it can be salvaged, albeit with some unpicking. I'm glad I finished it.

But enter the hero of our story: Bias tape! I've been on a bias tape kick lately, and I was already planning to use it for this project, but it really saved me this time! I ended up unpicking all the edge seams, and I had already trimmed and clipped my material to lay flat in the collar corners and around the neck. So my serger smoothed things out for me and I serged all the outer edges, (you wouldn't normally need it with the bias tape) -- it trimmed it all up nice where I had clips, etc. Much easier to work with.


Yeah, bias tape is pretty awesome, and it made my little pirate vest look just right and covered my crazy edges. I added some gold buttoms and YO HO HO! My birthday boy is a pirate!


Aaaarrrgh! I wanted to share this tutorial, but I did it all wrong. So make me walk the plank... If you want a vest tutorial, head over to that blog I mentioned earlier and search her tutorials -- hers is much better! I will, however, be sharing a tutorial for my bias tape cape in my next post. :)