Tuesday, July 26, 2011

Summer maxi dress -- shirring (Part 4)

How's your dress coming? I'd love to know if you're making one and how it's going...

And now, if you're doing the gathered bodice, it's time to finish it up!


To do this, you'll need to buy some elastic thread; I found mine at the fabric store by the prepackaged elastic. It's elastic so thin that you can use it as thread.

Please excuse the close up, but this is a good illustration of the final look of the bodice:


I've seen this method described as smocking or shirring. Not sure what the difference is, but I'm thinking that shirring is what we'll do here, a simple gathering. Smocking is several layers of shirring with decorative thread on the top side, like you might see on little girls' skirts or shirts. But just a guess...

To start, you'll need to hand-wind your bobbin with the elastic thread. I stretched it a little as I did this...


Then you'll load your bobbin in your machine. One of my big sewing machine books said you should bypass your tension disc in the bobbin case, but that didn't work for me. I ended up threaded it as normal.


Here's my test fabric. The top is the correct; you can see the elastic thread, and then on top I used the blue thread I'd been using for the rest of the project. The bottom was my attempt to bypass the tension disc; as you can see, it totally didn't work. I also didn't need to adjust anything else on my machine.


By the way, if "tension disc" is confusing, here's the illustration from my sewing machine. The arrow is pointing right at the tension disc; it's what pulls the thread tight so it doesn't just spin out of the bobbin.

I started sewing at the top, making sure I was sewing vertically right down the middle of the bodice. I back stitched just a few stitches at the top but not at the bottom. I left the threads long at the top and bottom. I pulled on the elastic to gather the bodice, then I sewed it again, right over the top of my other stitches. You can pull on the elastic again if you want to gather it more.

The top stitching at the top held the threads ok. At the bottom, I sewed a very small horizontal line across the bottom to hold the stitches in place (no elastic, back to regular thread for this part). I did it this way because I didn't want to have a horizontal line at the top; I thought it would show. But maybe it won't and that will work better for you than the back stitching.

And that's it! Here's how it looks on the back...


And here's the front view...


If you didn't do this, the bodice looks really, really plain. So here's your chance to be creative and dress it up. One thing I've seen lately that I love is the knit braids. That was my plan before I decided to gather it; there's a good tutorial here to help you create the braids. You would then tuck the ends under and hand stitch it to your bodice; I was going to put it along the bottom of the bodice/top of the skirt, but it would also be good for the straps as well. Or you can do some fabric flowers, some ribbon... The possibilities are endless!

Enjoy summer in your new dress!


Tuesday, July 19, 2011

Summer maxi dress -- hemming (Part 3)

Welcome back for the third part of the summer maxi dress tutorial -- hemming! Your dress should be all put together, you just need to finish the bottom. And if you want an edgier look to your dress, you can totally skip this part and leave the bottom raw because knit won't unravel. :)


Oh yeah, check out that caboose! Haha, I was just giving my hubby some attitude, but it shows off the back of the dress. So that's what you get. Well, back on topic. Hemming.

Just a little note -- I did my hem like a traditional hem where I folded up the material and then folded again, and I recommend you don't do that. As I mentioned earlier, knit does't unravel so folding it twice is unnecessary and just more work, plus I think it made things a little harder on my double needle. But if you're not using knit for this project, then you should fold up twice.

I found this method to be the best/most professional looking way to pin the hem on anything. I tried on the dress and determined about where I wanted it to end and added 1.5 inches (that's for folding it twice -- if you're only folding it once, add 3/4 inch or whatever you want your hem allowance to be). I laid it flat on the ground and spread out the bottom of the skirt and cut it as straight as possible at my measurement.

Then I hung it up (took some kitchen clips to hold it in place). Someday I might get me a dress form, but those things are so expensive! It would really come in handy, but here's my substitute and it works pretty well. Notice the dress is inside out so I'm looking at the wrong side of the fabric.


Grab your tape measurer and pins. Fold up your hem the desired amount and pin (or fold again and pin). If you plan on using your double needle, put the pin on the other side. You'll need to sew from the right side with that method.


I like to pin the hem in halves. I pin in the middle, then the sides to kind of divide it up. Then I fill in the halves. Turn the hanger and repeat. Once you have it pinned, kind of double check with your tape measurer that it's even, then stand back and do a visual check to see if it's hanging about how you want it to.


I used this method to sew a special dress for my little girl; I hand sewed the hem, so I just left it on the hanger after I pinned it to sew it and it made it so much easier!!

You don't need to do anything special, just sew up the hem. You shouldn't need stretch at the bottom because it should be large enough to hang loose and walk comfortably in. If you're using the double needle, read on...

Here's the deal with the double needle: I found very little information online, and what I did find wasn't very helpful. So this is probably one of those things you have to work out through trial and error. This is what it looks like...


It has a single shank but then splits into two needles. As long as your machine has zigzag capability, which I think is pretty much any sewing machine anymore, you should be able to use it. Check your manual and see if it says anything about it. My manual basically says two itty bitty things about it, as in if you use it, don't use a big zigzag. Yeah, thanks.

Now, double needles come in different widths. I have one that is 4.0 (that's 4 mm between the needles), and one that is 2.5. My 2.5 is a stretch one, specifically for knits, although it was giving me trouble and I ended up using my 4.0 universal. I'm pretty sure it's because my fabric was too thick with the double fold on the hem. So basically I think the universal do a great job; just pick one that's the width you want.

This is what it looks like on the top; it mimics the cover stitch commercial clothes have on the hem, although those were created with a 5-thread serger.


The underside looks like this...


And just note, that isn't the bobbin creating the zigzag, it's the needle threads. I kept thinking I was doing something wrong because I thought the bobbin would do it. Nope...

And also note, my machine would occassionally skip a stitch; the bobbin wouldn't catch both needle threads, just one. This was driving me crazy and I was spending my whole day to fix it. I would test it on some extra fabric and it would do ok, but then on the actual hem it was much worse. Again, I'm pretty sure this is because I did the double fold. However, my friend told me she had the same problem, on only a single fold and not a knit. So this may just be the nature of the beast.

Hopefully your manual is more helpful than mine and tells you how to thread this and what settings to use. Mine didn't, so after some testing, here's how I did it on my Singer basic model. Make sure to use some scrap fabric and test it on your machine.

I threaded my bobbin like normal, then I loaded a second bobbin to use as my second needle thread. Notice that extra metal stick on my machine? I did use that for holding the extra thread, but it was really loose compared to my other thread (there on the left of this pic), so I ended up putting them both on my thread holder. I just had the threads unwind in opposite directions (I read that on one of the websites that had some info on the double needle and it seemed to work well).


I then threaded my machine like normal and just divided the threads at the bottom. My machine has two thread loops just above the needle so I put one in each and then threaded each needle. Another website suggested putting the threads on different sides of the tension disc. I tried both ways and it didn't seem to make a difference on mine, so try that both ways.

I made sure my needle was set to the center position, and the straight stitch worked better than setting my machine to a so-narrow-it's-straight zigzag.

And one more note: My needle, even the wider one, was small enough to fit through the throat plate, the opening where the needles go down and grab the bobbin thread. However, my left needle got ever-so-slightly bent and it would go down and catch on the bobbin mechanism, making the machine stall and bend the needle out more. It was freaking me out! If this is happening, check if your needle is bent back a little and gently bend it toward you. This fixed it -- sensitive little things! And please leave me any questions in the comments -- this is a tricky thing!

Just play around with it, then go ahead and hem like normal. Make sure you're sewing from the right side/the outside so the zigzag in on the bottom. Also be careful that both needles are sewing through the folded-up fabric -- you don't get the benefit of seeing where you're sewing with this method. 


Good luck, and we'll see you next Tuesday to finish up the bodice with some shirring/smocking.

Tuesday, July 12, 2011

Summer Maxi Dress (Part 2)

Welcome to Part 2 of our little summer sewing adventure -- you actually get to sew this week!


So all your stuff is cut out right? And you saved all your scraps, right? Then let's get started! First, the straps...

But wait, a little note. No groans please. I'll be brief: There are two kinds of needles -- a universal/regular has a really pointy end, but there's also a needle called a ball-point. This one is rounded so instead of piercing the fabric, it pushes the fibers out of the way. Ball-points are great for knit, and it will be easier on your fabric to use this kind of needle. I found mine at Hancock Fabric... Now back to the project!

If you're doing this on a serger like I did, pull out some of those scraps and test your serger settings. I had mine on a wide three-thread stitch (left needle in, right needle out). And, as always, even if you have the Brother 1034 like I do, every machine will be different and you'll need to test your stitches on a scrap to make sure you have the right tensions, etc.

Here's my settings:
Left needle: 5.75 (normal for me)
Upper looper: 6
Lower looper: 3.5
Stitch width: 3 (normal)
Stitch length: 5 (normal)
Feed differential: 1.6

So when I started, I had to play with the loopers because they were a little weird, and you will definitely need to switch your feed dogs to more gathering because the knit is stretchy. Everything else was normal.

If you're doing this on a regular machine, you can just straight stitch most of this. :)

Put your straps with right sides together and stitch both long sides and one small side. I curved the edges on mine because it's easier not to turn corners on my serger and I was going the easy route. Here's one sewn and one ready to sew...

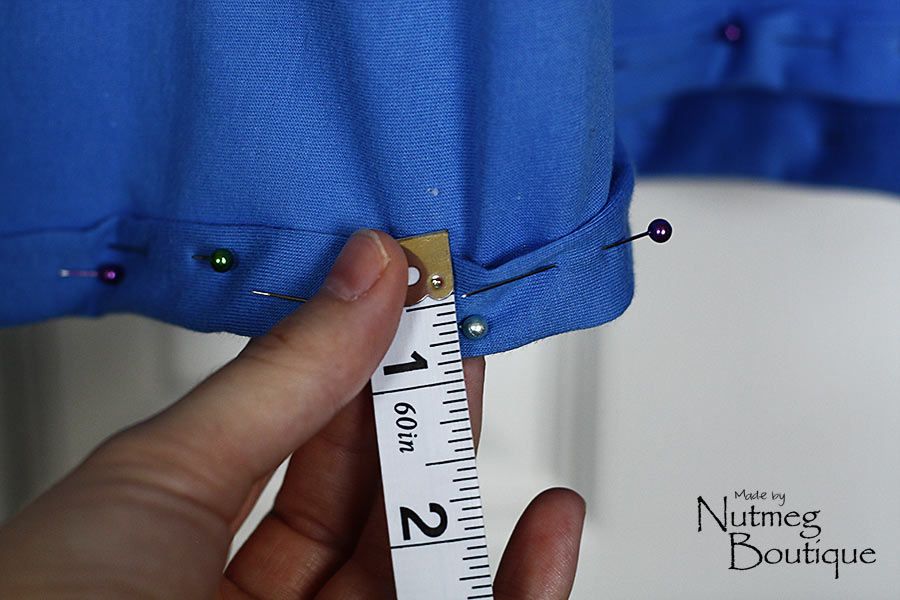
Turn your straps right side out. Now, hold up your front bodice piece against you and measure about how far you want the straps from the MIDDLE to determine where to place them (you're doing this because if it's too big, you'll be taking off extra from the sides and you don't want to mess up where you put the straps...). Lay your front bodice piece on the floor with the right side facing you and put your straps where you want them, the unfinished edge lined up with the top of the bodice.


Then put the second front bodice piece on top, right side down and wrong side facing you. Pin together along the top, then sew along the top.


If you're sewing the straps into the back, just repeat the above steps. If you're not (like doing halter or strapless), simply put the back bodice pieces right sides together and sew along the top.


Now, this part is a little tricky to explain but easy to do. First, set your sewing machine or serger to gather -- on a sewing machine you will increase the stitch length and you'll need to pull on the bobbin thread to gather. On a serger, you'll increase your feed differential all the way AND increase your stitch length all the way. With knit it doesn't gather like on regular fabrics. I had it cranked up on both these settings and it still didn't gather quite as much as I wanted. **Please note, if you're doing strapless, I suggest doing this part on a sewing machine so you can gather it more.**

Open up the bodice front and bodice back and pin them together along the side seams, right sides together. Make sure the seams you just made line up.


So, as you sew the two bodice pieces together on the serger, you'll also gather them at the same time. If you're doing this on the sewing machine, I suggest once you get it like you like it, go back and stitch it with a regular stitch over your gathering stitches. Once you sew both side seams, it should look like this (this is the right-side view).


Go ahead and turn the bodice right side out and fold half the bodice in. Notice the puckers in my side seam? That's the gathering. This is what it should look like...


Now for your first fitting. Go try this part on to make sure it fits. Mine was huge!! If that's the case, try to approximate how much extra you have, then unfold it and turn it back to the wrong side and redo the side seams, coming in however much you measured. Try it on again and try to get it just how you want it.

Now for the skirt. We're going to gather the front skirt, but just in the middle. Plus your machine should already be set up for it. :) I left about four inches on both sides and gathered everything in the middle.


Now, you can simply repeat this for the back if you want the same amount of gathering. I didn't want too much gathering in the back, so I trimmed a little triangle from the edges of the back so it would match the shape of the front (I came in about four inches along the top and trimmed it down to the widest part of my hips, so about six or seven inches). Also, make sure to shape better than I did -- try to smooth out the edges and make it gradual at the hip part of the triangle. Mine hung a little funny along my hips because I didn't...


Then sew the skirt front and back together along the sides, right sides together (make sure to set your sewing machine/serger settings back to regular sewing).


Now we'll attach the skirt to the bodice. Turn the skirt right side out. Hold the bodice upside down and slide the skirt into the bodice, so the unfinished edge on the bottom of the bodice meets up with the top of the skirt. Start to pin it together (I like to do this on the inside) by matching up the side seams as illustrated below -- the skirt is on the inside and the bodice on the outside.


Once you've got it pinned at both sides, then just take it in halves. Start with the front and try to make the gathers even as you pin it in place.


Now do the same with the back. I didn't gather in the back, but it's still too big to lie smoothly, so I kind of just gathered the fabric as I pinned it in place.

Sew the skirt to the bodice. As you can see in the pic below, I pinned it on the inside so I'm basically sewing along the bottom of the circle of the skirt (this makes it easier for me to see what I'm doing), instead of the traditional method of sewing along the top/outside of the circle and having it go under the arm of your sewing machine. But do it whichever way feels better to you.

If you're serging, you should be good on your stitch -- the three-thread overlock provides a good amount of stretch. If you're using your sewing machine, you may want to switch to a narrow zigzag and increase the stitch length a little.


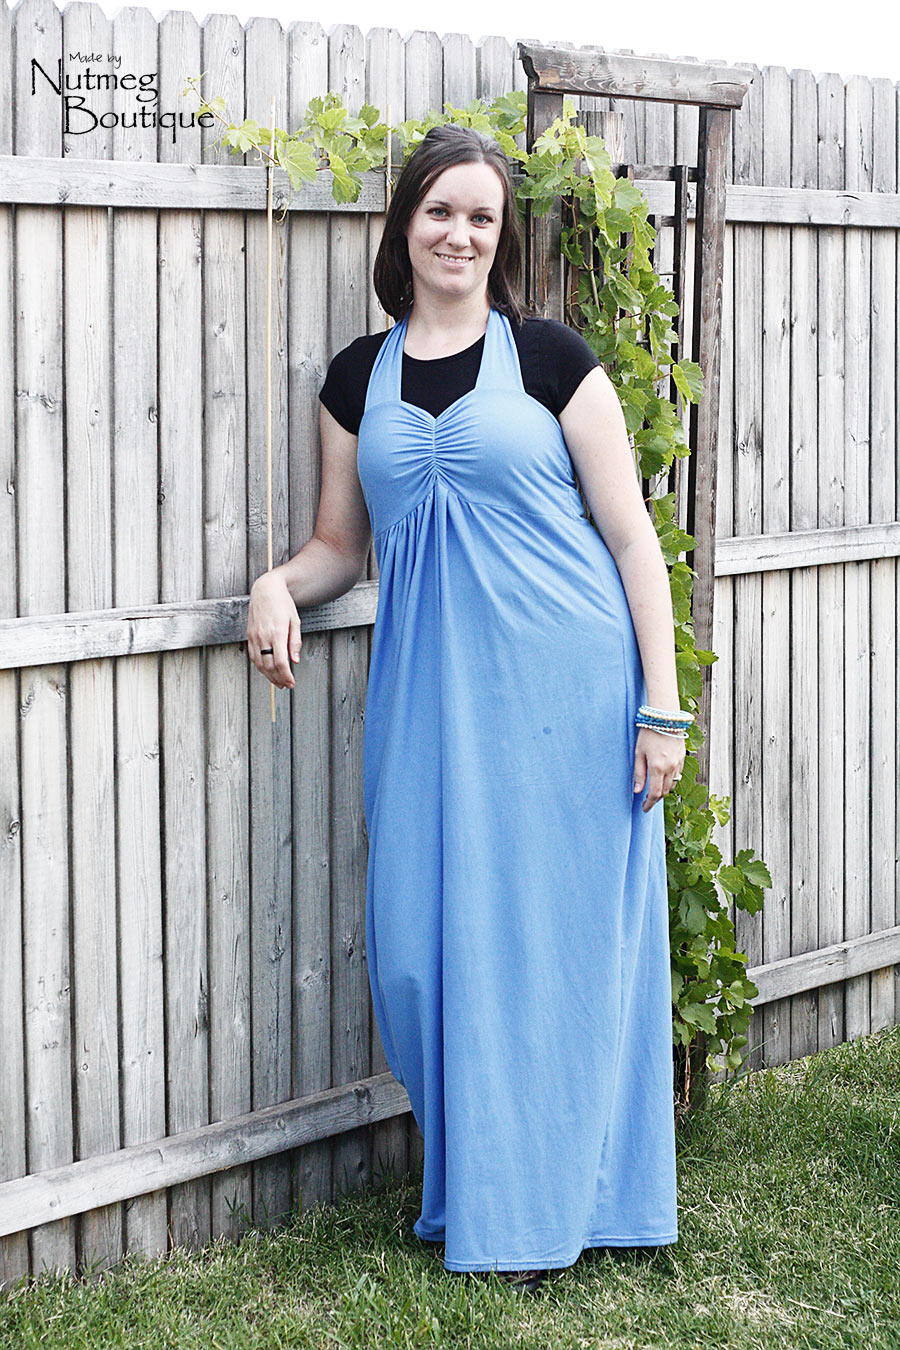
And now your maxi is all put together!


Join me next Tuesday and we'll go over hemming the bottom and then smocking/shirring the bodice. :)

Tuesday, July 5, 2011

Summer maxi dress (Part 1)

There are so many cute maxi dresses out there, just none that really fit my budget. So I set out to make my own -- and I did, for $6. :)

And you'll have to excuse me; I didn't get to take these pictures, I had to be in them since this dress is made for my measurements... Not crazy about being the model, but hey, it's only going to get more embarrassing when I tell you my size and measurements.


This dress was actually pretty easy, and I used several techniques I've been kind of avoiding because they're intimidating. And isn't that the way to get over your fear? Scared of spiders, so hold a spider? (Which, by the way, I am and I have absolutely no intention to ever hold a spider. I won't even pick them up when they're dead, with a tissue. Eeeewwwwww...)

So I've been avoiding knits, because I wasn't sure how to work with them, my double needle, because two needles are scarier than one, and smocking/shirring (it has TWO names!). If that's still too intimidating to you -- no worries! You can work your way around them. Except I think you should totally do it and learn as much as I did (peer pressure working?).

Ok, come closer: (whisper) I'm a size 12 or so. There. Whew. Not so bad. That being said, I had two yards of this fabric and had exactly what I needed. I was actually too generous and needed to cut several inches off here and there. However, I was kinda not-so-smart when I cut out my fabric and did it by what fit where, not by the way the fabric should actually be cut -- with the little lines in the knit going up and down on all pieces, not side to side. I still think you'll have enough with 2 yards, just pay attention to the grain of your fabric. (*PS -- This also means that you can use whatever fabric you like if you don't want knit. Even though I didn't have stretchy where I wanted stretchy, it fit quite well.)

Grab a paper, a pencil and a measuring tape. Really, I'm waiting. Let's start with the bodice. And just a little note on the bodice: I tried to do it differently and it totally didn't work, but that's where the smocking came in and I like how it turned out, so I'll give you two options on the bodice. Option A will be more of a tube top, straight bodice (not what I have pictured -- easier of the two) and Option B will be my mess-up turned awesome bodice (as pictured) and will include an extra step.

Take the tape measurer and measure across the biggest part of your bust from side seam to side seam of whatever you're wearing. My measurement was 19.5 inches. Do the same for your back; mine was 18.5 inches. Now, please adjust this part based on the size of seams you like to take; I usually like to do 1/2 inch seam allowances (that means you line the edge of your material up with the line on your sewing machine that says 1/2). So that would mean you would add 1/2 inch to each side, or 1 inch total.

So using my example, you'll have a rectangle that's 20.5 inches across for the front, and 19.5 inches across in the back. **Another little note: I was really nervous I would cut off too much, so I was extra generous and cut myself a few extra inches. I totally didn't need it -- it was waaaaay too big on me, but the best part is I just trimmed it down. So if you're a little nervous, add an extra inch or so. You can always take it off later.


So, for Option A (shown in above picture), you'll cut out FOUR rectangles, two measuring 6.5 inches tall by (your front measurement here -- mine was 20.5), and two measuring 6.5 inches tall by (your back measurement here -- mine was 19.5).

For Option B, cut out the back as described (two pieces, 6.5 by 19.5). For the front, cut out two pieces 7.5 inches tall and (your front measurement here -- mine was 20.5) You're then going to curve the front pieces only, like in this picture below. And don't worry about being exact, we'll change the shape when we do the smocking.


Next, the skirt. For the width, measure across the biggest part of your hips, side seam to side seam (I find I get the biggest measurement on this when I'm kneeling; this will give you the most room in your garment). Mine was about 22 inches. I wanted the skirt to not hug me too much, and I wanted enough room around the bottom to walk. So I added three inches, then I added an extra two inches to cover the seam allowances and add an extra bit of gather. So take your measurement and add 5 inches -- 27 inches for me.

For the height, take a measurement from just under your bust and measure where you want your dress to land (for me, just touching the tops of my feet). This was about 47 inches for me, then I added two inches for the hem allowance, so 49 inches long.


So cut out two rectangles (your width measurement here -- mine was 27 inches) by (your height measurement here -- mine was 49).

And finally, the straps, if you want them. You could skip these if you just want a tube top. These you can do in so many ways! Make them skinny or fat, do halter and tie them or make them criss-cross in the back. And the remaining amount of material you have left will also determine the size of your straps (plus I don't think you need to worry about the grain as much on these pieces, so cut them out however you need to). You will need four pieces of whatever size you want to make them.

I cut mine 3.5 inches by 25.5 inches, and they're actually a little too fat for me. If you want to do a halter like me, I suggest making them fat, because they sit well on the front, and tapering them toward the end, so they're skinnier for the tie.


And that's it! You should have four bodice pieces (two for front, two for back), two skirt pieces and four strap pieces. And please save all your scraps, especially you do Option A for the bodice. It's rather plain and you'll want to use your scraps to make it more interesting.

Go find some fun summer material, cut out your pieces and meet me back here next Tuesday for Part Two.