Monday, February 13, 2012

A special Valentine for my little cupcake...

I am soooo excited to share this little project with you! It turned out almost as good as I hoped, and it was really quick and easy! So here's my special Valentine for my little girl...


She got a little kitchen for Christmas (it's the Little Tykes cupcake kitchen). We also bought her a small food set (the kind that has velcro and you can "cut" apart), and my husband made her a little table. Well, I thought my tiny chef could use an apron to wear while she's whipping up something to eat. She's almost 18 months, and she likes to dress up and she already knows to put the plates on the table, and put her cupcakes on the plates. It's ridiculously cute!


Ready to make your own? You're gonna die at how easy this is...

First off, I didn't make the apron; I found it at Hobby Lobby ($2) in the aisle where they have plain bags and shirts and onesies. For the price, it was totally worth just buying it. You can also get it 40 percent off with their coupon, so super good price! If you wanted to make one, it wouldn't be hard; but I'll save that for a later tutorial. :)

I really love B's clothes that have little letters or flowers sewn on them, so I thought I would do the same with the cupcake. At first I tried to draw my own outline, but I'm not much of an artist. So I found some clip art online to give me my cupcake outline. (The heart came from the clipart in Microsoft Word.)


I cut the pieces apart, then I pinned them to my cupcake fabric. I already had some white and pink knit on hand, and you need such a small amount, this is the perfect time to use up some scraps. You could use whatever scraps you wanted, but I picked knit because it doesn't fray and unravel.

Now, when you cut these out, make sure to leave about 1/4 inch extra around the edge. You're going to use the edge of your paper pieces to make your sewing lines and you want some extra fabric...


Next, take your fabric marker -- make sure it's water dissolvable or air dissolvable -- and mark around the edges of your pieces. This is where you will sew. Then I put the fabric on top of my clipart and traced the inside lines.


Once you've got your pattern on your piece, place it on your apron and carefully smooth it out without stretching it. Pin it in place and then get sewing on those lines! Make sure to start with whatever piece needs to be underneath, in this case the cupcake liner.

I started by stitching the outline to get the edges tacked down, then I went back and did the lines in the middle, making sure to backstitch at the beginning and the end. (This shot is from the back so you can more easily see my stitching.)


And here's a little note that will make this a little easier and look better: Because my apron is a twill or light canvas and doesn't stretch, and my knit is really stretchy, it's easy for the knit to get bunched up. The way to avoid this is to not just move the fabric around curves like you normally would. When you need to adjust the angle at which you're sewing, lift your presser foot and readjust the fabric. It was the presser foot that bunched up my knit, so if you lift your presser foot any time the fabric looks like it's stretching or you need to curve your line, it will look much better.

Of course, I figured this out on the frosting part, so I have a little bunching on the cupcake lining. Go figure. :) This technique also helped me get my lines just right. On parts of this and especially on the heart, I basically sewed one stitch at a time, lifting my presser foot and adjusting my fabric after every stitch. A little labor intensive, but I was so happy that my heart looked like a heart!


My fabric marker is water soluable, so I got the corner of a washcloth wet and dabbed my fabric; the blue lines came right off (thank goodness! This was the first time I had used it and I didn't test it first, haha...).

I also wanted to write B's nickname, sugar baby, below (it fit so well with the cupcake, too). My first idea was to use my new sewing machine to sew it on; it came with three fonts. But I think I'm still a little intimidated to try that -- I was afraid I wouldn't like it and it would mess up my project -- plus I wasn't crazy about the font styles with this particular project.

So after my failure with my son's shirt, I was thinking this was the perfect time to learn how to use fabric paint (which is what I should have used for his project). So I picked up a small thing of white fabric paint at Michael's ($2). I looked at their stencils, and they were too big/wrong font for what I wanted, so I decided to stamp the letters on -- easier, faster and I already had several alphabet sets on hand.


I put a little blob on my plate and smeared some on my foam brush. You really need just a tiny bit! I also counted out how many letters and figured I needed the center line to be between the r in sugar and the space before the second word. I started with the second word, then did the first word, working backwards, to place my letters just right. Now, if you use clear stamps, it will be that much easier because then you can see exactly where you're putting them. And no worries! This won't ruin your stamps; the fabric paint came right off when I rinsed them in water.


Notice my b and a are a little weird looking? That's where I started; after that, I made sure to stamp it once on the plate before putting it on the fabric. I think I had too much paint on there and that's why it blobbed a little. It turned out much better if I stamped it once -- lightly -- before stamping the fabric.

I let it dry overnight, then presented it to the little lady for her approval (and get some pictures, of course).


I feel like this is taking longer to explain than to actually do. :) I love the way it turned out, especially since I hadn't really done stuff like this before. I loved the fabric paint; I'll probably add some fancy sprinkles to the frosting with some pink fabric paint, too.


Happy Valentine's Day from me and my sugar baby!

Monday, February 6, 2012

Valentine's Day sale...

If you need something special this Valentine's Day, then today is your lucky day! I'm having a sale on all my Valentine's cards in my shop, but it's only today and tomorrow. They're a whopping 50 percent off, so hurry! Just click on my etsy shop box at the left...

Happy 100th!

My son is in his first year of school (pre-K), and he absolutely loves it! And this last week they celebrated the 100th day of school. He was sooooo excited for it. And as part of the celebration, each student created a 100 shirt. When I set out to do this, I wanted it to be really cool but really easy at the same time. He was pretty happy with it.


I just used an undershirt I had (I had bought a pack for his pirate costume). I'm glad I had white because then we could use any colors we wanted, but it was a little thin. So maybe next time I would buy a plain shirt from the craft store.

He loves writing, so I wanted it to actually have the number 100 on there. I started by printing out the one and the zero in Freshman font from my computer. Then I cut them out and used them as templates for my blue felt.


I fiddled with these a lot, getting them placed just right and pinned down where I wanted them...


Then I opened the shirt from the bottom and slid the shirt under my machine's presser foot and needle. It was much easier working with the opening on the bottom because it's bigger. Even so, the last zero ended up a little crooked. I was having some trouble with the inside stitching on the middle zero (just me getting used to my new machine), and I think when I was trying to fix my machine, I pulled on the shirt too much and moved it. Oh well, my son still loved it...


I had several ideas for how to put 100 things on this shirt. I wanted to do baseballs, but the idea I came up with for that would have involved drawing the red stitching on 100 buttons and sewing them on. Yech... Even hot gluing them seemed like too much work, and then I'd worry about washing it.

When wandering the aisles at the craft store, I found some ink that said it was permanent and worked well on fabric. It also happened to be right next to the foam stamps (NOT in the scrapbooking department). They had some sports stamps. That screamed easy and boyish to me...


So last Saturday, I put down a bit of vinyl to protect my table and we grabbed the ink and the stamps. In reality, my son didn't get to help as much as I had hoped. I handed him a stamp and showed him how to ink it, but he got the (permanent) ink all over his hands. So I ended up inking it and he told me where to put it, then we pushed on it together. So just watch out with this project! He did enjoy making it though. He got 25 footballs, 25 soccer balls, 25 baseballs and 25 stars.

**Okay, sad note: Somehow this got in with the wash (I am glad my little man is learning to put his dirty clothes in the hamper), but so much for their permanent, fabric ink. Washed right off! So now it just says 100. So just know if you use stamps, don't wash it!


Even sister was pretty impressed with his shirt...


My son is 4, and as I said, we had a bit of a mess with the ink. But if your child is a little older/more inclined toward arts and crafts, this would be the perfect indoor project. And he loves this shirt because he helped make it.


He wore it to school and proudly showed it off to his friends. As part of the celebration, they also made necklaces with 100 beads, got a 100 celebration rub-on tattoo and made hats. He loved it!

So maybe if you have a special occassion or trip coming up, this is a fun, little idea to help them get excited about it. It would also be a fun Valentine's craft -- make a felt heart and sew it on then let your little one add their own embellishments. You could also do this with an apron, a super hero cape, etc. Actually, I'll share a similar project (hopefully next week) of something I'm making for the little sister for Valentine's Day. :)

Monday, January 30, 2012

Mixing it up for my cravings...

So when I was pregnant with my little girl (who, by the way, is 17 months now), I was having cravings for Butterfinger mixes. And the craving has continued, because hey! Butterfinger is just so good in soft, vanilla ice cream. I love to get it at Sonic or my favorite Okie ice cream place, Braum's.

We've been really trying to get our finances (and our waistlines) in order, and I knew the first place I needed to cut was going out to eat or for treats. And to encourage myself to do this, we're trying to recreate our fast food favorites at home on the nights we would have gone out (and make them a little healthier, if we can swing it). Well, that craving was back, so I set out to make it at home. Now this is NOT Butterfinger ice cream or a Butterfinger shake. Those totally didn't do it for me. I loved the soft-serve stuff with the chunks of candy bar freshly mixed in. And I found a pretty good substitute:


This was so easy it's ridiculous. Pull out your blender, some vanilla ice cream (I actually got the low-fat, lowest-priced stuff at Wal-Mart and it worked great) and four or five fun-size Butterfingers.

I put 10 good-sized scoops of ice cream in the blender, and then crunched up four of the little candy bars (I did a few with the rolling pin and a few by hand -- the rolling pin pulverized the candy bar but made it perfect for mixing. I like a little bigger chunks, so doing it by hand was better for me...). Add those in and set your blender to mix. I used a spoon, carefully staying away from the blades, to help it mix around a little better and voila! Butterfinger mix.


Are you hungry yet? :)

This made about three servings (my serving in the picture was the biggest one, and these are baby bowls). I took one more Butterfinger, broke it in a few places and sprinkled a little more on top because, like I said before, I like some occasional chunks in mine. Mmmmm, mmmmm, mmmmmm! Took like 5 minutes and completely satisfied my craving.


Good? So good, in fact, he was too busy eating to smile for me. I was also thinking you could make this a bit healthier if you used frozen yogurt, and you could certainly substitute any of your favorite candy bars. Maybe for Valentine's Day I'll make the hubby a Kit-Kat mix...

Monday, January 23, 2012

How refreshing -- necklaces where I can actually find them...

While I was making my earring organizer, I knew I had to do something about my necklaces, too. I have a ton of really long ones, and several with fine little chains or chunky medalions that things get stuck on. And I never wore any of them because they were a giant mess...


Here was my temporary solution, hanging on a few nails beside my earring hanger (which I absolutely adore -- makes picking out jewelry so easy). Still a big mess...

So I signed the hubby up to help me, and we made a very easy -- and inexpensive -- hanger. I used some wood he had leftover. We ended up using a piece 16 inches long and 2.75 inches wide. I had him add some nice edge trimming...


Ahhhh, such a great guy for helping me with all my crazy projects!

We sanded it up and then he drilled holes for my hooks. We left 3 inches on both sides, then added holes for six hooks, 2 inches apart. Here's the only thing I had to buy for this project (got them at Home Depot and they work fabulously):


After my hubby pre-drilled the holes for my hooks, I sanded the whole plaque and painted it with the same color as I did the earring holder (haha, or so I thought; I noticed it's a little darker shade of brown... Oh well). I also sealed it with some polyurethane. I tried out the spray kind and it was great -- much easier to get a smooth finish.


I had my husband use his router to make me some keyhole holes in the back for hanging, and I used two nails to hang this. If that's not an option for you, you can easily find hanging hardware anywhere; I suggest using two instead of one for something as long as this (plus it gets kinda heavy with all the necklaces on there).

The hooks are long enough that I had room to double up my longer necklaces (which keeps them out of reach of the baby fingers) as well as kind of separate the necklaces on the hooks.


See? I have a lot. I may still not wear these frequently, mostly because of grabby baby fingers, but it's so much easier on the eyes and my peace of mind knowing if I do want to wear one, it will be a snap picking it out and putting it on. I won't have to untangle everything to find what I want... Love it!


Plus I needed a special place to hang a pretty amazing gift I got for Christmas. Thanks, Erin! Here's the pictures we forgot to take before I left. :)


Monday, January 16, 2012

Remaking a dresser, overcoming intimidation...

This was a project months in the making: Mostly months of procrastination, a few weeks of talking myself into finally doing it and then about two weeks to actually do it. Sad, huh? I have never redone furniture, and while I was really excited about the project, I was a little nervous to start. Guess I was hesitant because I didn't know what I was doing...


But I was really tired of having this sit in my garage, so I finally motivated myself to get it done. And I love the way it turned out. Wish I would've gotten over my fears sooner...

We have a bazillion books at our house, and I was actually looking for a book case for my son's room. We didn't find one for a good price when we were yard sale-ing, but we did find this little guy for $5. So I figured I would give it a try...


It was pretty banged up, missing some handles, and some chunks out of it. But I really liked the character of it. Plus I was able to minimize the imperfections when I painted.


We used spray paint for this project, so if you're going to do that, I think you can sand or not. I think you can sand a little if you want to rough up the surface and give the paint something to stick to; I decided to sand because I wanted to buff out some of the scratches and nicks.


We whipped out the electric sander, and I'm glad my hubby did the work on the main body of the dresser. There were a couple of layers of paint under the black, so I think it had already been painted twice. I wasn't able to get quite as much off when I sanded the drawers, but I think the main goal isn't necessarily to remove what's there -- just make it so you have an even, mostly smooth surface to work with.


So here's the part I was nervous about: the painting. I wanted to try spray paint because I was hoping it would be faster, and a few of the friends I had spoken with said it would be a smoother finish because you don't use a brush. I needed a good get-me-going, and I found it at All Things Thrifty, a blog written by a friend of mine from college. If you need a little more ideas when it comes to redoing furniture definitely check our her blog! Her tutorial here is what helped me get going on this dresser.


This color is called Colonial Red (Rustoleum) in a glossy finish. I had gotten bright red, and it was almost too much. So I just sprayed over where we started with the other color. The employee at Home Depot told me I didn't need to seal it since I was using glossy spray paint, but it seems to chip off easily so I may regret that.

And mess ups? Yep, I think I was afraid of that and I got that on one side. Before I found Brooke's tutorial about how to use the spray paint, my hubby did one side and, not sure why, but the paint dripped and ran like crazy. So we let it dry really well and I went back over it with the sander, used a dry towel and then a moist towel to make sure I got all the old paint and dust off. Then I just repainted and it turned out just fine!

I got these knobs at Ikea, and the original plan was to paint them into little baseballs. But then I found some vinyl baseballs on Etsy, and I thought it would be too much with both. Plus, I was worried the baseball detail would rub off as we used it. So I stuck with just the vinyl, and I really like it.


And it has been sooooo nice to have! My son has two drawers for books, which has cleared up room in the living room so little sister has a drawer all her own. Plus we have a drawer for cars, a drawer for shoes and a drawer for dress up clothes/winter clothes. Ahhhhhh, feel so organized and not quite so cramped in other places.


Do you have a project you've been putting off because you're intimidated? Just not sure where to start or worried you'll mess it up? Well, it's a new year! Time to just dig in! Look for a good tutorial, pull your stuff out so it's staring at you, take a big breath and just go for it! If it's not perfect, all the better. It will have some great character. :) And if you do mess up, remember you'll probably learn more and there's always a way to fix it.

Monday, December 5, 2011

A little twist on a favorite classic...


I'm not a big wreath person; somehow they always turn out too traditional and, well, boring to me. But I found some wreaths on etsy that just blew me away and I had to try and make one...

I love argyle prints, so I fell in love with it on a wreath, and the fact that the wreath was wrapped with yarn? Sold...

I decided to make a team one as a Christmas gift (eh? eh? great gift idea right here)... And as hard as it looks, it really didn't take me forever like I thought it would.

I actually did this kinda on my own, but later found a good tutorial on it here. I used a 12" styrofoam wreath, and it was really easy to wrap. And just a tip -- leave the yarn on the skein. It's much easier to throw a ball of a yarn through the wreath than trying to pull a really long string through over and over and over...

Then I made the little diamonds. For a 12" wreath, my diamonds were 1.75 inches tall and about 2.58" wide. They lined up almost perfectly. Then I used the black yarn to wrap around one direction, coming up and across my diamond, then wrapped it back the other way to make the argyle pattern.


I used hot glue to tack down all my yarn ends and my felt.

I printed an O and a U off on my computer in Freshman font, then used them to make my letters. I hot glued those onto the crimson and cut it out. I put some plastic mesh (found in the embroidery aisle at the craft store) onto the back of that to give it some structure, then added a second layer of crimson felt so you wouldn't see it. With that all sandwiched together, I just hot glued it to the wreath.


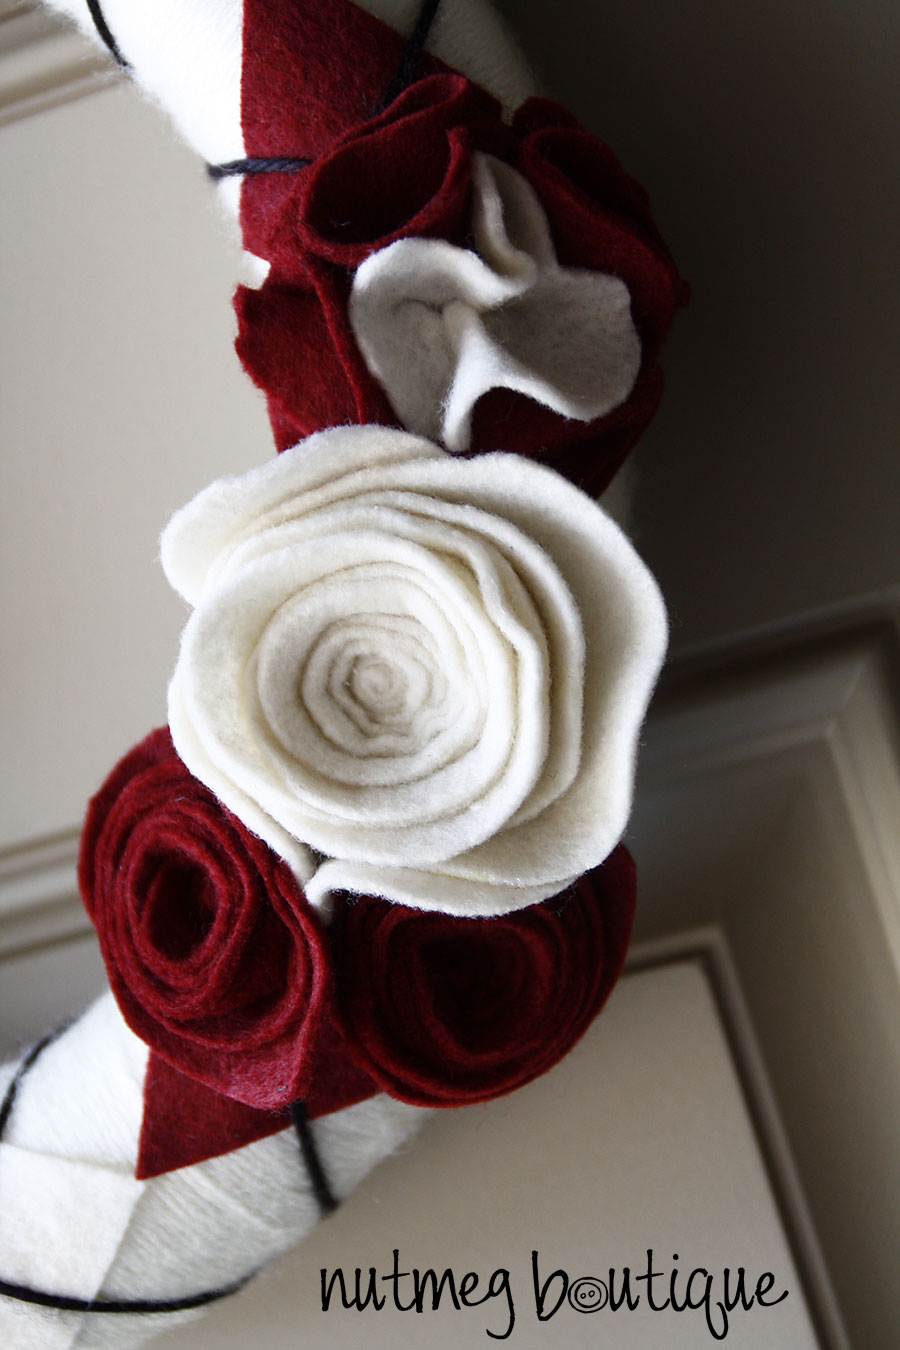
Then I made some felt flowers, following this tutorial again as well as a combination of this one and this one.


I used lots of hot glue on those babies as well, and that's it. Well, I did also include something to hang this with (although my clear over-the-door one fit perfectly, but it's not for me...). I just took nine strands of yarn and braided them together; I wanted it to be thin enough not to detract from the wreath, but I wanted it to be interesting at the same time. I really love it! Fun way to show some team pride...